Due to the COVID-19 pandemic the exam centers of Juniper are at time of this writing closed for external visitors. Fortunately the Juniper Education team did a great job and made JNCIE lab exams available from your own home!
Now this does impact how you make the test and also what resources you have available to you during the test and also what you are allowed to use. In this blog I will share how the testing environment works and also exactly what documentation you have available for reference.
How do I access the exam?
The Juniper Education team did a good job in preparing candidates for a remote lab attempt. When you schedule your lab, you will receive an e-mail with extensive instructions on how to prepare yourself for the exam and even include a link to access a demo environment to make yourself aware with what you will be faced with on the day of your actual attempt. The testing environment gives you access to some Juniper documentation. It will give you access to a vSRX to test CLI access and your keyboard mapping in the remote desktop tooling. The main goal is to prepare your computer for the test as well.
Requirements
Windows PC or Laptop (Linux and Mac not supported!)
External monitor is allowed, I believe even multiple external monitors
Wired or wireless mouse
Wired external keyboard or built-in laptop keyboard (wireless keyboards are not allowed)
No headsets or music listening is allowed
Stable internet connection with sufficient bandwidth for the remote desktop access and a webcam stream
Zoom Desktop app
Empty walled room/office. Nobody can come in during your exam.
Clean desk, nothing should be in reach of your hands
No paper or pens allowed
Dry erase board is allowed on your desk to take notes. You will need to show it’s empty when you start and that you completely wipe it clean after the exam is finished. This can be a board behind you on a stand or on the wall, as long as it’s visible to the webcam.
The exam will be delivered through an application called Safe Exam Browser (SEB). This will block all your other apps on your PC and just open a browser screen, remote desktop session and Zoom call to the proctor. A dedicated file to join the SEB session will be e-mailed to you just before the exam starts.
When the remote desktop session opens, you will have access to the following apps
SecureCRT with bookmarks to the devices for your exam
Notepad++ to take notes and store configuration snippets you are working on
PDF reader for viewing documentation
The remote desktop session will use your own screen resolution, so if you are fortunate to have a big monitor (I’m using a 34″ ultrawide 3440×1440), it’s possible to have the exam tasks, secureCRT window and notepad++ window in 3 columns on the screen. Which I feel is the best set-up for me, to read on tasks, take notes in notepad and type in the commands on the CLI.
For further details on the exam environment, please read this FAQ from Juniper very carefully as it will make your preparation for the big day better. Basically the same rules apply as when you would take the test on-site, it’s now just in your own home.
One of my concerns was how the documentation is accessed. Of course to pass this exam, you need to know 95% of the configurations by heart. For those last few small knobs or complex things it is very welcome to have access to the documentation. When accessing the documentation you can either open the documentation folder on the virtual desktop and open the PDFs using a PDF reader. But you will also have access to the PDFs using a browser session that is available within the SEB environment. Please know that you do not have access to the documentation website, only the PDFs.
To make it easier, I asked the Juniper Education team what is available to the candidates. Please be aware that the list mentioned below is different for all JNCIE lab exams. In this case it’s the documentation available to JNCIE-DC candidates.
The Juniper Education team shared the list of PDF filenames with me and I have permission to share this on my blog. I did not receive the actual files, so I have linked these PDF names to what I believe are the documents on the Juniper website, but that is my own best guess and is not officially confirmed!
I hope this helps explaining the JNCIE remote lab experience and specifically showing the documentation that is available to you during the test. Good luck on your attempt! I’m curious to learn how you feel the remote lab works and of course if you passed!!
After having some feedback regarding my previous post on running the JNCIE-DC self-study workbook in EVE-NG. I wanted to share some of the most common questions I personally experienced while using the lab and general things to be aware of and some tips!
I also ran into some aspects of going through the workbook that also would change some small decisions I made when deploying the lab.
vQFX version
The more recent versions of the vQFX are experiencing some issues inside EVE-NG. Sometimes the vQFX RE comes up in the line card role. This is an aspect of Virtual Chassis technology, which is not supported on the vQFX. When the system is in line card role, it means it does not maintain an editable configuration as that would be done by switches in the VC with Routing Engine role.
I am currently running vQFX with Junos 17.4R1.16 and that is very stable at the moment. In the JNCIE-DC lab environment a much older version is used, so for feature parity is not an issue and stability matters most right now. So stay away from the more recent Junos 18.x and Junos 19.x vQFX versions to ensure a stable device. I have gotten them to work plenty of times, but it’s not stable enough and I don’t want the lab to be in my way when I’m studying for an exam.
vQFX data-plane / em1 interface
The vQFX is supported to run in 2 different versions. ‘light’ mode and ‘full’ mode. Light mode means that you only boot up a routing-engine image. This deployment will only support any layer 3 IP services to, for example, test IP Fabric use cases. Your interfaces will all map to ’emX’ ones and will not be shown as xe-0/0/X in the system. To utilise the virtual PFE, the full potential of the vQFX and the ability to run layer 2 bridging and EVPN services you will need the ‘full’ version which requires to deploy a second VM for each vQFX which will run a virtualised version of the Q5 PFE.
It’s key to have the connection in place between the vRE and vPFE. This is done by making a connection on port em1on the vRE and port int on the vPFE. On the vMX the connection is similar, but once made in EVE-NG the configuration is not visible in Junos. On the vQFX the IP addressing between these 2 VMs is required to be in the configuration, otherwise you will lose the connectivity to the vPFE and that will result in losing the xe-0/0/X interfaces being visible from the CLI.
It’s easy to miss this out, because the vQFX boots up with a full list of interfaces with regular ethernet-switching configuration. During your labbing it’s easiest to delete the entire interface stanza before starting, but by doing this you will also delete the em1 interface which handles this vRE to vPFE communication and needs to be configured with the IP address 169.254.0.2/24. The em0 interface is similar to the fxp0 interface on vMX and that is your direct connection to the virtual RE or the out of band management interface.
When I start working on a new vQFX I immediately delete all interfaces, but make sure you put the em1 configuration back! Along with maybe your management subnet configuration!
delete interfaces
set interfaces em1 unit 0 family inet address 169.254.0.2/24
Management subnet
The JNCIE-DC workbooks consists of many chapters and many parts within those chapters. For each part in a chapter there are separate starting/initial configurations as they typically do not build on top of each other. This means you will be loading a lot of new configurations during your labbing.
Copying and pasting configurations over the virtual console connection that EVE-NG sets up to the serial port is typically not the best idea. Unless you delay the speed that your terminal emulator pastes information in the window.
To also get the best connection to your devices. I would recommend using the out of band management interfaces (em0 on vQFX and fxp0 on vMX) to connect to the devices. It gives me the most stable connection to the devices and does not mind pasting in big chunks of configuration.
The initial configurations of the JNCIE-DC workbook are set-up with an out of band management subnet of 10.10.20.0/24. I’m using a different subnet for my lab devices VLAN, so when I open a new initial configuration I have to do a find-replace action. You could also make your life easier by using the subnet in our lab if that’s an option!
The SSH access to the devices is really helpful again to quickly load configurations, which I not only use for the initial configs, but also for copying and pasting parts of config between devices during the labs.
Initial configurations
Take good care of loading initial configs for each part. EVE-NG is not the best at managing this on Juniper devices, because it expects a device to be logged in. Which a Juniper device never is. You always end up in a log-in prompt.
I found it too much of a hassle to work on updating the configs, as each chapter has multiple initial configs for the various parts of the chapter. This means you will be loading and replacing a lot of configurations during your work in the book.
I find it useful to save my final configs for each part as well. Some people like to log all the command outputs to a text file, but I feel that’s a bit much when you’re working on a lot of devices and are typing a lot. Saving final configs does help in checking your answers in the book at a later time. I typically work on it in the evening and then only have time to finish a few parts of a chapter. The next day I’ll go back and verify my work in the book and review my configs in text files.
When loading in the initial configurations. It’s important to keep in mind your management subnet on the fxp0 and em0 interfaces, so that you don’t lose connectivity after a commit!
Loading in a brand new configuration on a Junos device is fortunately very easy. Just use the load override terminal command and paste in your new config. After a commit your device has a complete new identity!
Copy/Paste between devices
When working through the chapters. You will find that a lot of configuration will be similar on multiple devices. Especially routing protocol knobs such as authentication or policies. I find it very useful to do configuration on one device and then using a show | compare to verify. Copying the output of that to a new device works really well by using the load patch terminal on the other device to load in the differences.
I also find it very useful to have a text editor open next to me. I use Sublime Text 3 with the Junos plugin so it highlights the syntax. Especially configuring a lot of BGP peers (like in an IP fabric setup), it helps keeping the configuration consistent and only a few IP addresses will change between devices. Being able to quickly change this and then copying it over to the other device saves a lot of time and potential errors!
Reconfigurations
As mentioned before, the parts within the chapter do not build on each other. This means you have to wipe and reconfigure the devices before moving to another part of the workbook. I’ve experienced a few times that after I wiped the config and reconfigured the device for the next part (load override) that the devices can behave strange. Which would result in not having IP connectivity on links. The problem is that you will be configuring something and you want to verify that what you did is correct. So if verification fails, it makes you doubt your own config. In the case of reconfiguring the devices multiple times, I’ve seen it happen that sometimes the config is not correctly applied in the vPFEs. This means that the configuration does not reflect the actual implementation in the device. To get this fixed a full reboot of both the vRE and vPFE would solve this!
Flapping peers
Again similar to the previous point. I reset the configurations to a new part of the chapter and after verifying IP connectivity I thought everything was OK, but after configuring BGP. I experienced weird issues with flapping peers. Every 1 to 2 minutes all my BGP peers would suddenly reset. Even after a reboot of the virtual appliances!
I abandoned troubleshooting initially, because it was already late at night. I powered off my server and powered it back on again the next day. After the appliances were all running again. The problem was gone and my config hadn’t changed at all! So even if a reboot doesn’t fix your issue try to close the lab and re-open it in EVE-NG or reboot your entire server to fix issues of which you are (almost) certain they are not related to your configs!
EVE-NG Client Pack
As a few final thoughts I’d like to highlight some of the excellent features that EVE-NG brings to the table. The first I’d like to mention is the client pack that EVE-NG offers for all desktop operating systems. Logging in on the native console (not the HTML5 one, which I only use when I’m not connected of EVE-NG offers you the ability to open console sessions to your devices using your favorite terminal emulator. Which to me personally is iTerm2 on macOS and SecureCRT on Windows.
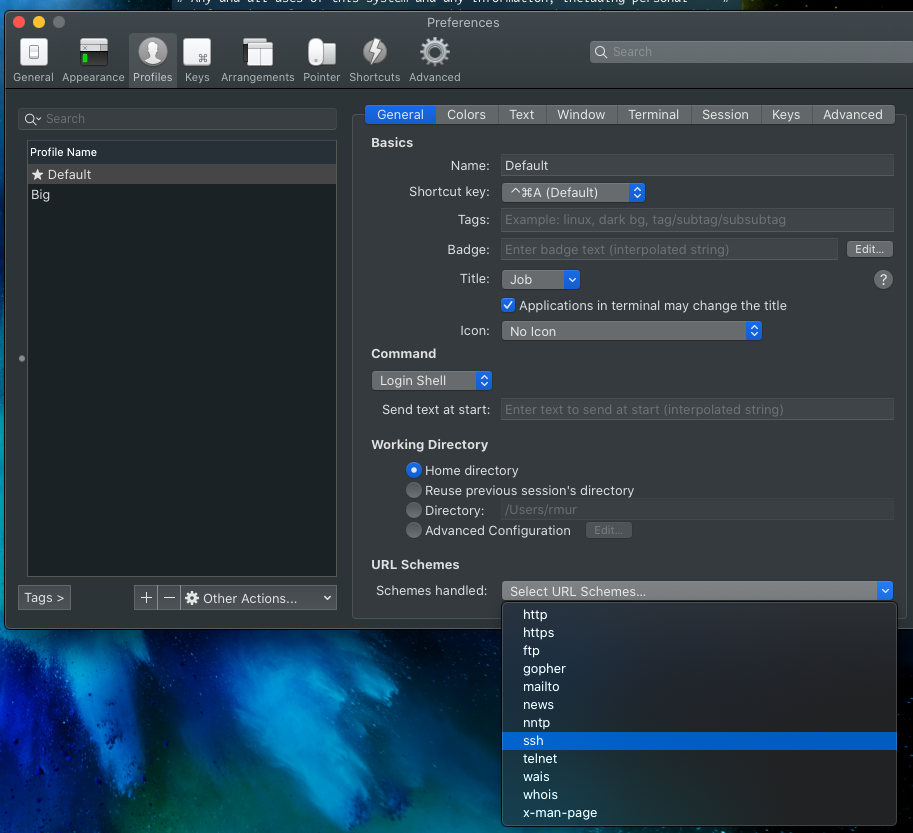
On iTerm2 ensure you select the setting to have iTerm2 be the default ssh:// url handler in the profile settings.
On Windows if you want SecureCRT to be used as default app to open console windows. The EVE-NG Client Pack installs scripts to make this easy. Go to C:\Program Files (x86)\EVE-NG\ and open the .reg file that reflects either the 32-bit or 64-bit version of SecureCRT which is abbreviated with sCRT. After running the reg file, SecureCRT should open automatically when opening console windows. If it does not search in your start menu for Default Apps, then go to Choose default apps by protocol and select SecureCRT as the default application for the TELNET protocol.
By default on Windows each session you open on EVE-NG will open a new window of SecureCRT. Where most people will prefer new tabs. To change this go into your SecureCRT config directory which is usually found under: C:\Users\<username>\AppData\Roaming\VanDyke\Config and find the Global.ini file and change the following line:
D:"Single Instance"=00000000
and update to
D:"Single Instance"=00000001
Now all new windows will open as tabs in the same window.
EVE-NG Miscellaneous
Depending on your server the bootup times it could take a very long time to boot all the virtual appliances. Sometimes it could feel that they are stuck, but be patient is the only solution to that (or faster CPU’s of course 🙂
Finally, make sure you update your EVE-NG installation using standard apt commands. Recently a vulnerability was discovered in one of the modules that EVE-NG uses so always make sure you are running an up to date installation. Fortunately that’s very easy to do!
As explained in my previous post on my home servers, I have a bare metal system deployed with EVE-NG Pro installed. As I’m (slowly) preparing for the JNCIE-DC certification I wanted to share the topology that I’m using.
As the hardware required to study for the JNCIE-DC is quite significant, it makes a lot of sense to try and virtualise most of these resources. Unfortunately not the entire blueprint can be tested with virtual appliances, but we can get a very long way. Some (or a lot of) experience with actual Juniper QFX and MX products is very useful in your preparation for the JNCIE-DC.
Juniper offers a very good self-study product for the JNCIE-DC. This self study workbook contains a number of chapters with in-depth tasks on a certain topic of the lab blueprint and also contains 2 full labs that are very similar in complexity to the real JNCIE-DC lab test.
At the time I’m writing this, there are (as far as I know) no options to rent a rack of physical hardware to prepare for the exam, because the self-study workbook offered by Juniper Education Services also uses a virtual lab topology based on the vMX and vQFX products.
The lab topology used in that self-study workbook is used in my topology as well, so you are able to do all labs in that workbook on this topology as the same virtual appliances are used.
JNCIE-DC Lab Device Blueprint
Let’s first take a look at the blueprint of the JNCIE-DC lab exam to know what topics are covered and what type of devices are used when you take the exam.
An important prerequisite is that you need a valid JNCIP-DC certificate to be able to schedule a lab date with Juniper.
The lab exam consists of a number of the following devices:
QFX5100 running Junos 14.1
MX80 running Junos 17.1
vMX running Junos 15.1
vSRX running Junos 12.1
Feature wise there should not be much difference between the MX80 and vMX devices as the Packet Forwarding Engine (PFE) is also virtualized in the vMX. They do run a different version of Junos, so that could be a thing to be aware of. Regarding features or maybe configuration that may have changed between these versions.
At time of this writing in 2020, the Junos versions running in the lab are quite old. They are still up to date as I’m not aware of any annoucement of an update to the blueprint or the versions in the lab. The versions are even that old that most of them are not available anymore to download from the Juniper website.
You can also clearly see that the lab consists of a combination of physical devices and virtual devices. Again, when configuring the tasks you will not (or should not) feel any difference in the handling and operation of the devices.
Juniper lab exams are also known to have extra devices in the topology that you will not have access to and do not have to configure, but where you will need to interface with and setup some form of connectivity with. They will act as external routers (like an Internet connection) or a remote site to interconnect with. So be prepared to know how to check connectivity issues from one side (like how to troubleshoot BGP adjacency issues for example from the local router, without knowing the configuration of the other side).
I would expect the devices in the lab to also have an initial configuration already present. You may even have to troubleshoot this as there could be a mistake in there on purpose.
In this post I will not cover the task blueprint as the Juniper website has a very detailed overview of the possible tasks and topics that are covered in the test.
JNCIE-DC lab in EVE-NG
The tasks of the self-study workbook are all based on virtual appliances, as mentioned before. We will use a multiple of vMX and full vQFX devices. The vQFX comes in 2 flavours: Lite and Full. The lite version only contains a routing-engine, which enables you to test routing features. For anything else than layer 3 routing (to test IP fabrics for example), you will need the full version which adds a second VM that runs a virtualised version of the Q5 chipset. These 2 VMs combined (just like with the vMX), run a full version of a QFX10000 type switch. Unfortunately this is not a QFX5100 based switch (which is based on Broadcom Trident 2 silicon). The main difference in configuration between the QFX10k (with Juniper silicon) and the QFX5100 is how layer 2 bridge domains and therefore EVPN configuration is handled, so before taking the test be aware of the limitations the QFX5100 has (hint: one ‘virtual’ switch vs multiple).
To be able to run the full topology that the workbook uses you will need:
6 vMX routers
6 vQFX switches
1 vSRX firewall
1 Junos Space VM
1 Linux VM
As both the vMX and vQFX require 2 VMs per device, it means we will need a total of 27 virtual machines to run the full topology. As you can imagine, this will consume quite a lot of resources on your system. I would recommend getting at least an 8 core CPU and 64GB RAM. The RAM requirement can be a bit lower as EVE-NG has excellent memory dedub features. The CPU core count is really the more the better. If you are able to run this lab running for a long time it’s not that big of a deal. Especially when booting everything up, a higher CPU core count is very welcome.
There is one important item that cannot be tested on the virtual appliances and that is Virtual Chassis Fabric, which is not supported on the QFX10000. The commands involved to get this up and running are not that much and the workbook offers a good explanation of it that should be enough for the lab exam.
JNCIE-DC Lab Topology
There are quite a number of connections to take care of. My good friend Valentijn Flik made a diagram of the topology as my versions turned out more like spider webs.
The main topology is seen as being 2 datacenter sites. One contains 2 vMX routers as spines and 2 vQFX switches as leafs. The second contains 2 vMX routers and 3 vQFX switches in a more typical CLOS fabric wiring. All devices have connections to either vMX5 or vMX6 for ‘backbone’ or external connectivity testing. The top vMX5 will be used more as peering or external connection router and the bottom vMX6 is more used as a simulation of network hosts in the setup.
Some devices have connections that loop back into the same device. These are called hairpin connections.
All devices have ports 6 and 7 also connected to an Ethernet Bridge. Using this bridge segment the lab tasks make use of 802.1Q or VLAN tags to simulate connections between devices that are not actually there. You do not need to make this on your own, as the initial configuration provided by the workbook will take care of this when you load up the configs for a certain task. The bridge in EVE-NG that I used is just a standard bridge network, which should be sufficient for all tasks.
I have also connected all devices out of band management interface to a virtual bridge that connects to my home LAN network so I can reach all devices over their OOB IP address.
Software
There are a number of software images involved with this set-up. The virtual appliances are available for download on the Juniper website. The best way to find them is via the trial options that are available:
As far as Junos versions are considered, I use very recent versions of the appliances, actually the newest at time of this writing. I do not expect behavior to be very different between the releases running in our lab versus the actual lab exam.
You will also want a Junos Space VM if you really want to test the entire blueprint, but you will need a Juniper account with software download access to get access to that. Fortunately the self-study workbook also comes with a number of vouchers to use the Juniper provided virtual environment, which should be more than enough exposure to Junos Space to be able to understand it fully.
As for licensing, the vMX has a default bandwidth limit of 1Mbps, which is more than enough for the lab testing. On the vQFX I’m not aware of any licensing limitations, only that the platform is only capable of a very low packets per second performance, so again perfect for testing! Finally the vSRX does have a time constraint without having a license installed. The system will not work anymore after 60 days, but this is easily reset by deleting and re-adding the device to your topology and as all tasks start with a fresh or initial setup, there is no problem in deleting and adding the device again. You will not lose work as I would recommend saving your lab configs after you finished the task, as it’s a great resource to check back on during your studies.
Using the lab
You can download my EVE-NG lab here, be aware that you will need to make your own device definitions first based on software images downloaded earlier.
After creating the Juniper virtual appliance templates in EVE-NG, it’s time to import or create the JNCIE-DC lap topology. I would recommend creating it yourself as you immediately learn a lot about which connections run where and it sets you up learinng the topology quicker.
Then the last part that’s required are the JNCIE-DC self-study workbook initial configurations. As the book and it’s resources are copyrighted I cannot share them here, but I downloaded them from the Juniper virtual environment. After purchasing the workbook you get a number of vouchers that allow you to schedule for a full day of lab access. If you log on to the Linux virtual machine, there is a folder with all workbook configurations on the drive. That VM should have access to the Internet, so you can store a zip file of that folder it on any file sharing website for use within your lab setup.
Happy Labbing
Now when all VMs are booted, you can dig into the workbook and load initial configurations of each chapter and start labbing! Feel free to use the lab topology diagram and/or the EVE-NG lab template for your own use and adjust for your own preferences when desired!
If you have any questions regarding the JNCIE-DC lab, running it on EVE-NG or have any JNCIE-DC study questions in general. Feel free to reach out below in the comments or via Twitter!