Limitless Networking

Category: SDN

What is P4?

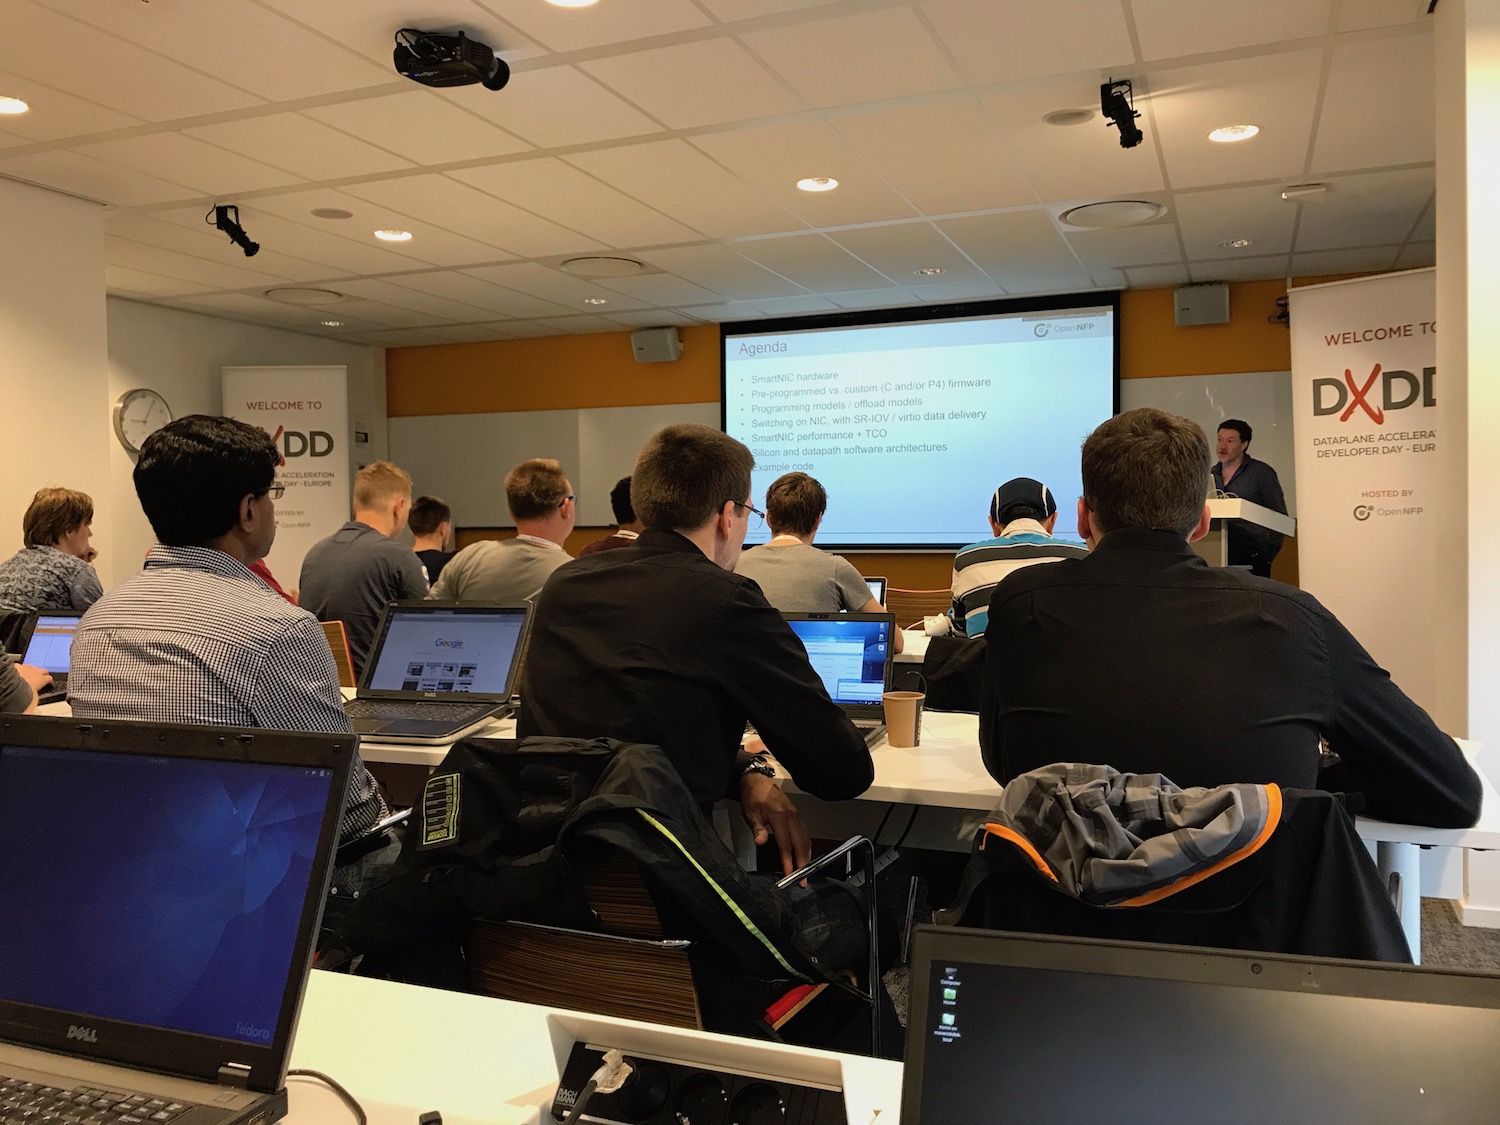
Recently I attended a workshop organised by the Open NFP organisation about Data Plane acceleration. The primary goal of the workshop was to get students and researchers (why was I there you may think) familiar with the P4 programming language.

P4 is a programming language created to simplify writing data planes for networking use cases.  Recently the P4-16 spec was released and could be considered a mature version of the language.

Now I’m not a hardcore developer. I know my way around in Python, GoLang and C#, but I never wrote anything more low level like C. P4 is created a little bit like GoLang, where I do not mean it as comparison, but as an architecture. P4 is designed so you only need to focus on the actual networking features that you want to make available on the hardware you are programming it for. Then when you compile it, it will generate runtime code for your hardware. Or as the creators explain it:

At one level, P4 is just a simple language for declaring how packets are to be processed. At another level, P4 turns network system design on its head.

There is no need to worry on low level memory management or other things that would slow down your development for that specific feature that nobody has in their platforms.

Now this is a major advantage. Full freedom in writing anything you’d like right? The downside is that very little (basic) functionality is not present when you start pushing code to a piece of hardware. You really have to do everything yourself. Which I think is  underestimated. P4 does help you in giving you some standard functionality in their spec that vendors should implement when they offer P4 capabilities, like basic switching or load balancing (ECMP) functionality.

Who supports it?

P4 is relatively new and therefore hardware support is not very common. I was able to find 2 products to support the full P4 spec at this moment.

Barefoot Tofino chip

Barefoot is the inventor of the P4 language and they have created a very fast ASIC like chipset. The chipset does not use a proprietary SDK like Broadcom, Cavium or silicon from large network vendors, but is fully open due to the support of P4.

They are partnering with white box vendors to create switches (32 port 100GBE) that are currently shipping.

Netronome Agilio SmartNIC

Netronome was one of the organizers of the workshop I attended and they have a shipping product. Their SmartNIC products are standard PCIe NIC’s with various connections that support offloading data plane functionality to the NIC rather than letting applications or the kernel spend a lot of CPU on it.

These products are not your typical switch or NIC, they basically do not have a default feature set available to use. The Barefoot switch for example, does not come with an operating system (NOS) and the NIC always needs to be programmed before any functionality works.

What about OpenFlow?

The most typically asked question would be: Is P4 the successor of OpenFlow? The answer to that is really simple: No! In some cases P4 may even use OpenFlow to program it’s forwarding table(s). Diagram courtesy of P4.org:

The P4 language is designed to program your networking hardware (or even software components). P4 does not contain a control-plane protocol to learn about forwarding table entries (that could be learned through a traditional or home grown routing protocol).  In other words: you have to write your own forwarding table programming protocol/application or use an existing one (like OpenFlow).

What about existing vendors?

There are rumours that major networking vendors (Cisco, Juniper, Nokia, etc.) could start supporting (parts of) P4 on their own silicon or implement the Barefoot Tofino chip in products, but no announcements have been made at time of this writing. Vendors are starting to open up their operating systems via programmability features (see Juniper’s Extension Toolkit JET for example), but this does not allow to directly program new features into the hardware (which is programmable in some cases like Juniper MX).

Summary

P4 will open up a lot of features that are currently unknown or don’t exist. It allows for a fully open and programmable data-plane. The use case for this technology would, as always, be the web-scale companies, who want to free up as much CPU resources to perform other tasks and leave the networking hardware to perform all networking functions.

For lower scale deployments, my opinion would be that, tools like DPDK, XDP or eBPF would already free up sufficient CPU resources and optimise user space or kernel networking enough for most people.

For more information on all the mentioned acronyms and tools, click the links in this blog.

One noticeable fun fact was that during the workshop I attended, I was able to spot one person on a Mac, two corporate Windows machines and all others running Linux 🙂

VMware NSX 101 – Components

Today I want to explain the basic components and the set-up of VMware NSX. In this case I’m referring to NSX for vSphere or NSX-V for short. I want to explain what components are involved, how you set them up for an initial deployment and what the requirements are.

Versioning

At time of this writing the latest release is NSX 6.1.4. This version added support for vSphere 6, although you cannot use any vSphere 6 feature in this release, there is support for the platform itself only.

vSphere

The first step is of course deploy your ESXi vSphere cluster with ESXi 5.5 or 6.0 with vCenter 5.5 or 6.0. I recommend using the vCenter Server Appliance (VCSA) instead of the Windows version. You will also need a Windows VM where the vSphere Update Manager is installed, this is not available as virtual appliance, only as Windows application. I also highly recommend installing an Active Directory server to manage all of your passwords. You will be installing a large amount of machines with all different usernames and possibly passwords. I recommend picking a very long and difficult one, as all VMware appliances seem to require a different password complexity.


After deploying the initial cluster it’s also essential to deploy a Distributed vSwitch across the nodes where you will be deploying virtual networks. For this feature you will need the Enterprise license (or the trial will suffice) when running ESXi 5.5 Update 3 and NSX (before that Enterprise Plus was required).

NSX Manager

The only component you download is the NSX Manager. This OVA file contains everything you will need for deploying NSX. After deploying the OVA through vCenter you are able to log-in to the Web GUI of the NSX Manager. The only setting available is connecting to the vSphere Single Sign-On server and to vCenter. When deploying all components make sure you set NTP servers for everything in the lab. There are many integrations and they all rely on authentication that also takes time into consideration.


After connecting the NSX Manager you will no longer need it that GUI. Within the vSphere Web Client a “Networking & Security” tab is now available.

NSX Controller

The next step is to deploy at least 3 NSX Controllers in the cluster. This is automatically done by the Manager after filling in required information. You need 3 for redundancy as the cluster will select a master controller, which is done by using a majority number (quorum). With only 2 nodes, there is no majority and therefore at least 3 are required for redundancy (think of RAID with Parity disks). The controller is the critical piece of the software. Here all ARP requests are handled and all information is shared with the ESXi hosts. The Controller will also take care of multicast replication when the unicast mode is chosen for transport.

Prepare hosts

The following step is to install 3 kernel modules in all hosts. This is done using the VMware Update Manager (the Windows application) and just a single click in the GUI. It will install the NSX module to communicate with the controllers, the Distributed Logical Router (DLR) and the Distributed Firewall. No configuration is necessary as all changes are pushed by the controllers.

NSX Edge

To get traffic to and from the virtual environment you will require an NSX Edge today, as soon as OVSDB is available this could be your MX router as well! The NSX Edge has 2 forms, the first is the Distributed Logical Router that offers basic routing, bridging and firewall features. The second version is a VM that traffic is hair pinned through, like a software router. The second version also offers VPN and Load Balancing features.

Pools

To support the VXLAN transport, the hosts need to get an IP address to use as source address. This can be assigned using DHCP or an IP Pool, more on this in a next blog! Next a Segment ID pool needs to be created to allocate VNI’s for the virtual networks (called logical switches). Today it’s not supported to have more than 4000 segments on NSX, which combines the regular port groups and NSX port groups on the distributed vSwitch.

Transport Zone

The final step is to create a transport zone. This defines a “data center” or a “site” where NSX runs. This limits the broadcast domain. Per transport zone you are able to select wether the NSX Controller should handle multicast replication (Unicast mode) or that the network should handle this (Multicast or Hybrid mode). The recommended choice is Unicast mode so you won’t require multicast routing protocols or IGMP from the network. VMware eliminates the need for smart network hardware even further with this, but the solutions runs best with optimized hardware of course running as IP CLOS Fabric offering “Layer 2 as a service” using network virtualization.

Logical Switches

Now the deployment is ready to have the first VXLAN segments created, which are called Logical Switches. These networks are created as distributed port groups, so you can use the standard tools to connect VM’s to these virtual networks and suddenly you are using VXLAN transport!


I hope this article gave you some insight in how NSX is configured and what components it consists of.


Happy Labbing!


Rick Mur

Using the Junos Space REST API

Automation is going to be fundamental in all networking products. I’ve been working a lot on integrating Juniper products in existing and standard software. There are many different ways to automate something on a network running Junos. Using REST (or RESTful) APIs is one way of doing this. The reason I’m using REST is that it’s fairly easy to understand, but the best thing is that a large amount of existing products supports REST to integrate with it.

The goal of this blog is to explain how Junos products support REST, compatibility with older versions and how it scales.

What is REST?

REST (REpresentational State Transfer) is a simple stateless architecture that generally runs over HTTP. There are 4 commonly supported commands. When you issue a command your input data consists of a URL, HTTP headers and a body holding the data.

HTTP Headers are used for things like Authentication and a Content Type to let the application know what data format the body will contain.
The URL specifies which data you want to receive from the application or you want to change.
The body is empty in a request for data, when you want to change some data this is typically XML or JSON data (defined by the Content-Type HTTP Header).

The commonly supported commands are:

GET – Request data from the application
PUT – Change/Update data
POST – Add new data
DELETE – Delete existing data It’s very important to know which commands your application supports.

It could be that an application only supports PUT commands instead of POST, so data you submit will override any existing entries (as PUT is a Change/Update action).

To test commands on a REST API there are many great Browser plugins that will let you create a REST call step-by-step. Below are 2 free and great plugins:

Postman for Chrome

RESTClient for Firefox

Junos and REST

There are 2 options to use REST on Junos products. The first one is to run it against Junos itself. Starting in Junos 14.2 there is full support for any feature on a box to be accessed through the REST API. In this blog I will not focus on this, because I want to look at a more scalable solution that is also compatible with older versions. All information regarding the Junos REST API is available on the public documentation page: Junos 14.2 REST API Guide

The second option which supports any Junos version is by using the Juniper network management platform: Junos Space.

Junos Space is a platform that hosts applications that manage your Juniper network devices. Any Juniper device running Junos is supported. Applications like Security Director, Network Director, etc. are applications by Juniper, but there are also applications written by partners for various other purposes. Applications have to be installed separately. In this blog I will be using the foundation: Network Management Platform (or NMP).

This platform will connect to all of your devices running Junos and will use NETCONF as a southbound protocol to communicate. It will detect which version of Junos the device is running and will select the correct schema. A schema consists of all possible configuration for that particular hardware platform and software version. The REST API of the NMP in Junos Space covers 100% of the commands that you can access in the GUI as well, so I have a full features management platform that I can access with a REST API and access my Junos devices through it. Very scalable and easily managed.

Let’s issue our first REST command to our Junos Space platform:

Screenshot 2015-01-02 12.11.48

We first need to authenticate ourselves, just like we would on the GUI. We do this by adding a Authentication HTTP header. Your REST Client should support encoding the credentials for you and generating the header.

After I added my credentials we see that I have access to all kinds of different services.
Screenshot 2015-01-02 12.14.00-edit

If I want to dive deeper I just follow the link given in the service.

Device Management

As an example I want to take a look at the devices currently registered to my Junos Space platform. I follow the link towards Device management and then Devices.

<?xml version="1.0" encoding="UTF-8" standalone="yes"?>
<devices uri="/api/space/device-management/devices" size="3">
    <device href="/api/space/device-management/devices/131087" uri="/api/space/device-management/devices/131087" key="131087">
        <deviceFamily>junos-es</deviceFamily>
        <OSVersion>12.1X46-D10.2</OSVersion>
        <platform>SRX210H-POE</platform>
        <serialNumber>XXXXXXX</serialNumber>
        <connectionStatus>up</connectionStatus>
        <ipAddr>172.22.1.4</ipAddr>
        <managedStatus>In Sync</managedStatus>
        <name>MaverickSRX</name>
        <domain-id>2</domain-id>
        <domain-name>Global</domain-name>
    </device>
    <device href="/api/space/device-management/devices/131095" uri="/api/space/device-management/devices/131095" key="131095">
        <deviceFamily>junos</deviceFamily>
        <OSVersion>14.1R2.12</OSVersion>
        <platform>VMX</platform>
        <connectionStatus>up</connectionStatus>
        <ipAddr>172.22.1.151</ipAddr>
        <managedStatus>In Sync</managedStatus>
        <name>vMX1</name>
        <domain-id>2</domain-id>
        <domain-name>Global</domain-name>
    </device>
    <device href="/api/space/device-management/devices/131099" uri="/api/space/device-management/devices/131099" key="131099">
        <deviceFamily>junos</deviceFamily>
        <OSVersion>14.1R2.12</OSVersion>
        <platform>VMX</platform>
        <connectionStatus>up</connectionStatus>
        <ipAddr>172.22.1.152</ipAddr>
        <managedStatus>In Sync</managedStatus>
        <name>vMX2</name>
        <domain-id>2</domain-id>
        <domain-name>Global</domain-name>
    </device>
</devices>

The output given by default is in XML format. If you like to work with JSON instead, this is supported as well. We just have to add another header. In a typical REST API I have a generic Content Type (in PUT/POST) or Accept (in GET) header for this called usually: application/xml or application/json. Junos Space however, requires a specific string for each request depending on what you want to see. To look this specific string up you can check the online documentation which is extremely well written and detailed! Junos Space REST API Guide Device Management

In the guide we find that we have to specify an Accept header of: application/vnd.net.juniper.space.device-management.devices+json;version=1.

Then we issue the same request again, but now with the Accept header added.

Request

GET /api/space/device-management/devices HTTP/1.1
Host: maverickspace.maverick.local
Authorization: Basic XXXXXX=
Accept: application/vnd.net.juniper.space.device-management.devices+json;version=1
Cache-Control: no-cache

Response

{
    "devices": {
        "@uri": "/api/space/device-management/devices",
        "@size": "3",
        "device": [
            {
                "@href": "/api/space/device-management/devices/131087",
                "@uri": "/api/space/device-management/devices/131087",
                "@key": "131087",
                "deviceFamily": "junos-es",
                "OSVersion": "12.1X46-D10.2",
                "platform": "SRX210H-POE",
                "serialNumber": "XXXXX",
                "connectionStatus": "up",
                "ipAddr": "172.22.1.4",
                "managedStatus": "In Sync",
                "name": "MaverickSRX",
                "domain-id": 2,
                "domain-name": "Global"
            },
            {
                "@href": "/api/space/device-management/devices/131095",
                "@uri": "/api/space/device-management/devices/131095",
                "@key": "131095",
                "deviceFamily": "junos",
                "OSVersion": "14.1R2.12",
                "platform": "VMX",
                "connectionStatus": "up",
                "ipAddr": "172.22.1.151",
                "managedStatus": "In Sync",
                "name": "vMX1",
                "domain-id": 2,
                "domain-name": "Global"
            },
            {
                "@href": "/api/space/device-management/devices/131099",
                "@uri": "/api/space/device-management/devices/131099",
                "@key": "131099",
                "deviceFamily": "junos",
                "OSVersion": "14.1R2.12",
                "platform": "VMX",
                "connectionStatus": "up",
                "ipAddr": "172.22.1.152",
                "managedStatus": "In Sync",
                "name": "vMX2",
                "domain-id": 2,
                "domain-name": "Global"
            }
        ]
    }
}

Tags and Filtering

The reason I’m using Junos Space is because I want to be scalable. I want to be able to apply a certain piece of configuration or I want to get a certain show command from a list of devices. That device list can change over time when I add more nodes to my network. So I need a flexible and scalable way of talking to a group of devices.  Within Junos Space I can specify one or more tags on a Device which I can then use to filter on in my REST request.

I can add Private and Public tags. Private tags are only visible for your username. Public tags are visible for everyone.

I’m going to add a private tag called: ‘RESTtest‘ to one of my devices.

Screenshot 2015-01-02 12.50.22Screenshot 2015-01-02 12.50.33

Now I can leverage this tag to filter on devices and find the right devices that I want a certain piece of information from. To filter I use a simple query string:  ?filter=(TAG eq ‘RESTtest’). When I want to filter on Public tags I query them using ?filter=(TAG eq ‘RESTtest:public‘). The documentation will explain in detail how tags can be used to filter and on which places in the API: Junos Space REST API Guide Tag Management.

Now I filter on the newly created tag and the output now shows just a single device.

Request

GET /api/space/device-management/devices?filter=(TAG eq 'RESTtest') HTTP/1.1
Host: maverickspace.maverick.local
Authorization: Basic XXXXXXX=
Cache-Control: no-cache

Response

<?xml version="1.0" encoding="UTF-8" standalone="yes"?>
<devices uri="/api/space/device-management/devices" size="1">
    <device href="/api/space/device-management/devices/131087" uri="/api/space/device-management/devices/131087" key="131087">
        <deviceFamily>junos-es</deviceFamily>
        <OSVersion>12.1X46-D10.2</OSVersion>
        <platform>SRX210H-POE</platform>
        <serialNumber>XXXXXX</serialNumber>
        <connectionStatus>up</connectionStatus>
        <ipAddr>172.22.1.4</ipAddr>
        <managedStatus>In Sync</managedStatus>
        <name>MaverickSRX</name>
        <domain-id>2</domain-id>
        <domain-name>Global</domain-name>
    </device>
</devices>


Summary

REST is a very powerful tool for all kinds of integrations that you want to build. Stay tuned for other blogs where I will use the Junos Space REST API to integrate with other networking products. Junos Space is a great tool for your Juniper devices to maintain and manage them, but most of all to have a central location where you can communicate with all Junos devices through REST and use tags to run commands on multiple devices without having to know the exact device details. It provides a great abstraction layer for your Junos based network.

© 2024 Rick Mur

Theme by Anders NorenUp ↑